How To: Add/Create a Barcode Template(s) in Asset Infinity
Barcode Templates: Before you print a sticker that you plan to use in order to track an Asset, you would need to Create a sticker in Asset Infinity with a certain layout, size, etc. that you name, which then becomes a Template of this Barcode that you can then use to Generate a Sticker and then subsequently print them to stick to your physical Assets and use it to track them.
Follow the steps below to begin with the creation/addition of these Barcode Templates:
Menu > Application Settings > Barcode Templates
The User can either search for Barcode Templates in the Menu bar on the left-hand side or one could also go to Application Settings and find Barcode Templates under this section.
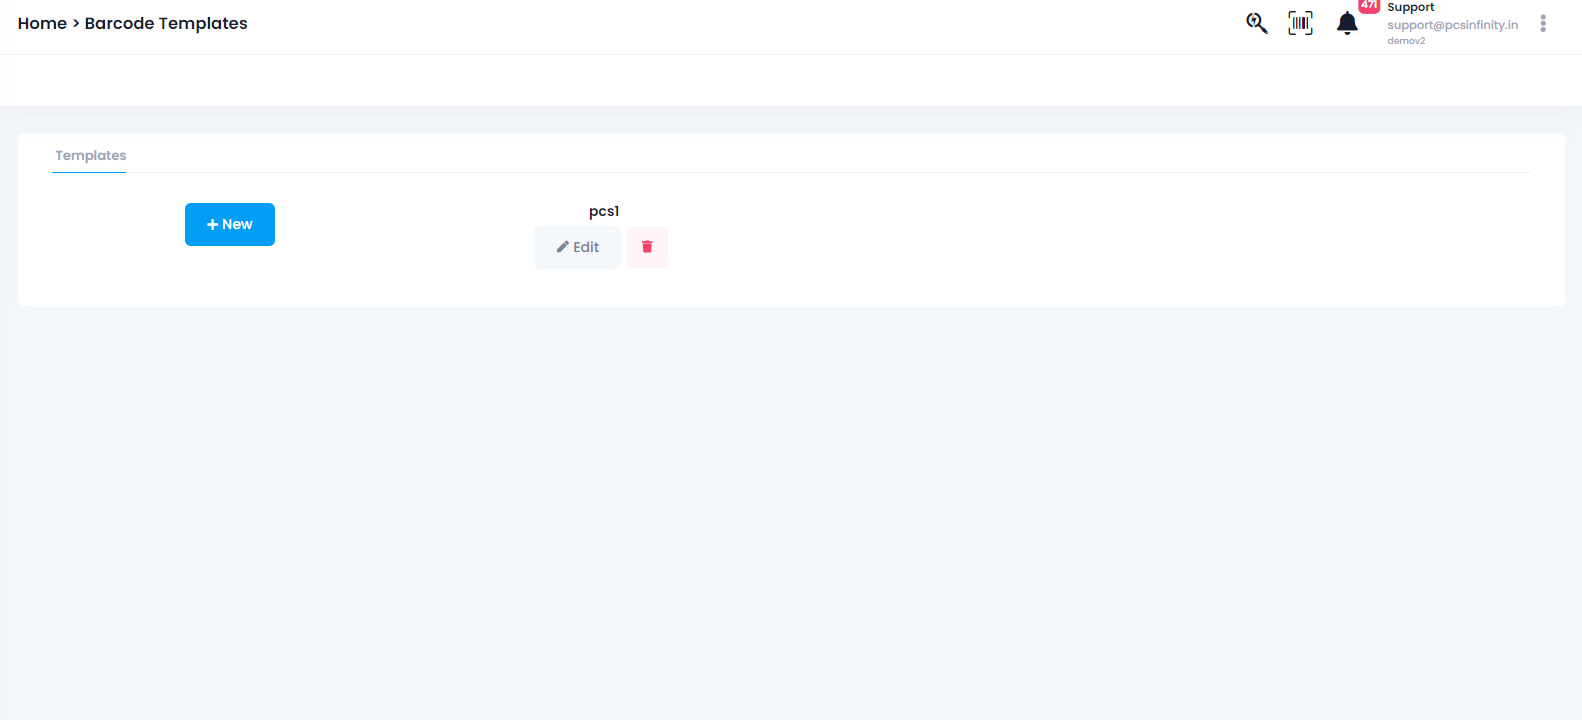
The below image shows the screen that is displayed on the right-hand side:
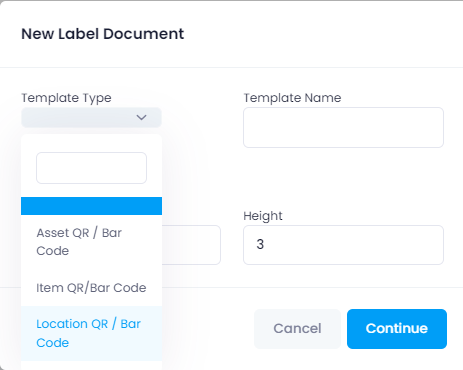
In order to create a new Barcode Template, the user would click on the blue 'New' button and the following screen will therefore appear:
In order to create a new Barcode Template, the user would click on the blue 'New' button and the following screen will therefore appear:
Upon selecting the Template Type, Template Name, Unit, Width and Height, you can click on 'Continue' to finish adding/creating a new Barcode Template.
Upon clicking on 'Continue' the following screen appears where you can design the template:
Upon clicking on 'Continue' the following screen appears where you can design the template:
When an attribute gets created a new sidebar of options related to the attribute appear on the right side of the screen as shown in the image below.
The User can use the options in the Right Sidebar to customize the attribute as they see fit. As visible in the below image there is a drop-down option "Data Field" in the Right Sidebar. This option is used to map the attributes to which ever field of the asset table is preferred. On selecting this option the template will auto-fill this value for every asset the sticker is generated for.
Once the Designing is complete click on the Save Button which is the Left most option in the menu above the Designing Area.
The user can also map other attributes to the same Data Field as in the example shown below. The User has mapped both, The text field and the Above shown QR code to the "Asset Code" data field.
The User can use the Print Preview Tab, as shown below to have an idea of, how the sticker will come out, when printed. If the User is satisfied with the output, they can go on to save and print the the stickers for their assets or they can go back to the Design Template Tab, to make further changes.
After designing the desired template for their barcodes, the users would then be able to view the newly created Barcode Template as follows:
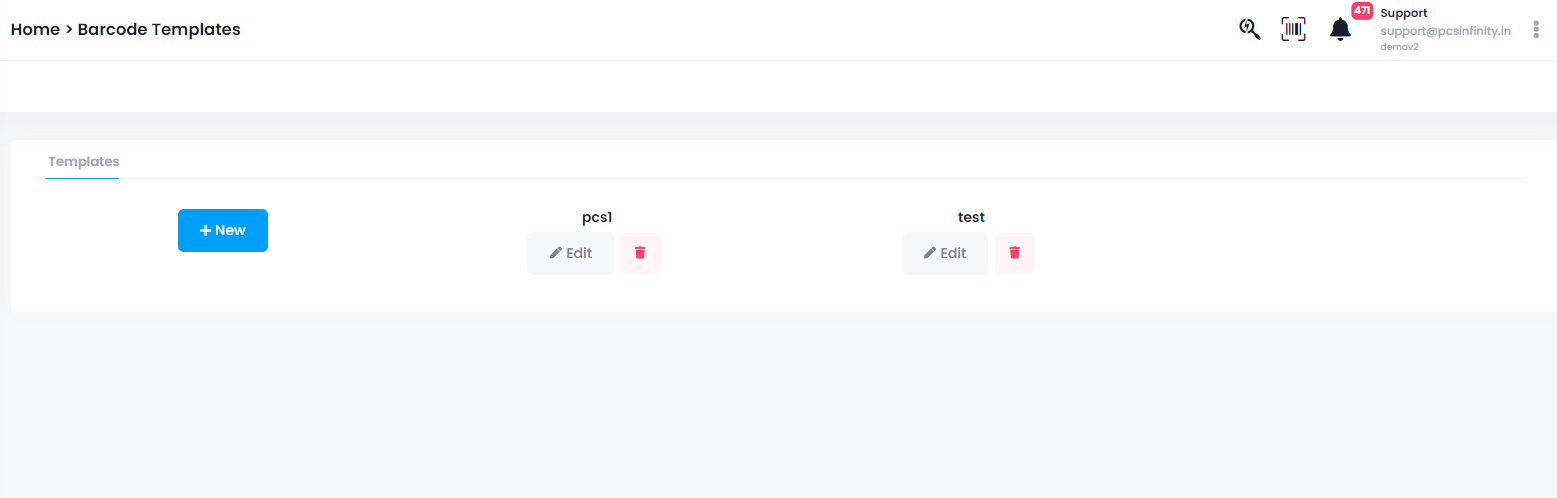
The user can then also 'Edit' or 'Delete' the created/existing Barcode Template, when chosen.
The user can then also 'Edit' or 'Delete' the created/existing Barcode Template, when chosen.
Related Articles
Customizing Barcode/QR labels
Customizing Barcode/QR labels Advanced Settings > Barcode Templates A new screen appears. User can design their own barcode templates in the application. Designing own QR/Barcode labels allows user to create a customized tag which can be ...Create Custom Fields
Create Custom Fields Menu > Advanced Settings > Custom Fields If user wants to add any field to the grid, whether it is Asset Master or Location Master, they can create through Custom Fields option. A form opens up: FIELD NAME ...How To: Add/Create a Department(s) in Asset Infinity
Department: In order for a User of Asset Infinity to assign a Department to the Users against each User of that Asset, they would need to follow the steps below to Add/Create a Department in Asset Infinity which can then be assigned to the Asset ...How To: Create/Add Location(s) in Asset Infinity
To Create Location for Asset/Inventory/User: These locations created are used to manage functions at different modules in the application. These appear in different parts of the application as required like while creating Purchase Order, Purchase ...How To: Add/Create an Asset Reminder(s) in Asset Infinity
Asset Reminders: In order to Add/Create a new reminder for an activity on a particular Asset, one would need to create Asset Reminders in Asset Infinity to begin with. Follow the steps below: Menu > Application Settings > Asset Reminders To view the ...